Debug printf
Typical the Debug printf() delivered with gcc is used
in this way on e2Studio an Synergy.

–specs=rdimon.specs
create an environment, where a breakpoint is called,
the program stop and the gdb read the buffered messaged to print it
in a console.
This debug environment is easy to create in your application. You have
only to initialize the stdio handles:
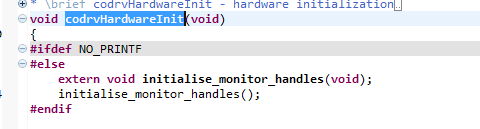
extern void initialise_monitor_handles(void);

initialise_monitor_handles();
That’s all and works with many debug interfaces.
But the problem is, that the program breaks and interrupts and timing is corrupted.
printf() using ITM
We use the S7G2 SK starterkit. This board uses an onboard JLink interface.
This interface support the simple Trace mechanismn over the SWD interface. Channel 0 is used for ASCII output and supported by the NVIC directly.
Add to your program the low level _write function to
output the characters to the ITM port.
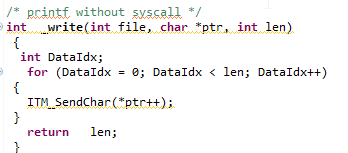
/* printf without syscall */
int _write(int file, char *ptr, int len)
{
    int DataIdx;
    for (DataIdx = 0; DataIdx < len; DataIdx++)
    {
        ITM_SendChar(*ptr++);
    }
    return len;
}
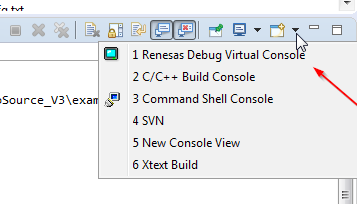
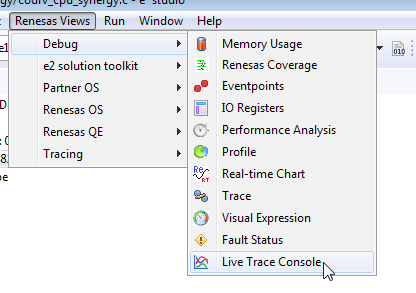
The output is only generated, it the trace port is open. Without them this output is ignored. You can get a problem (program stop at this point), if you switch the Trace port of the debugger during a session. If you want to see the output you need a Trace console. The Eclipse edition used with the default Synergy installation do not have it as a normal console. You have to use the Live Trace Console.
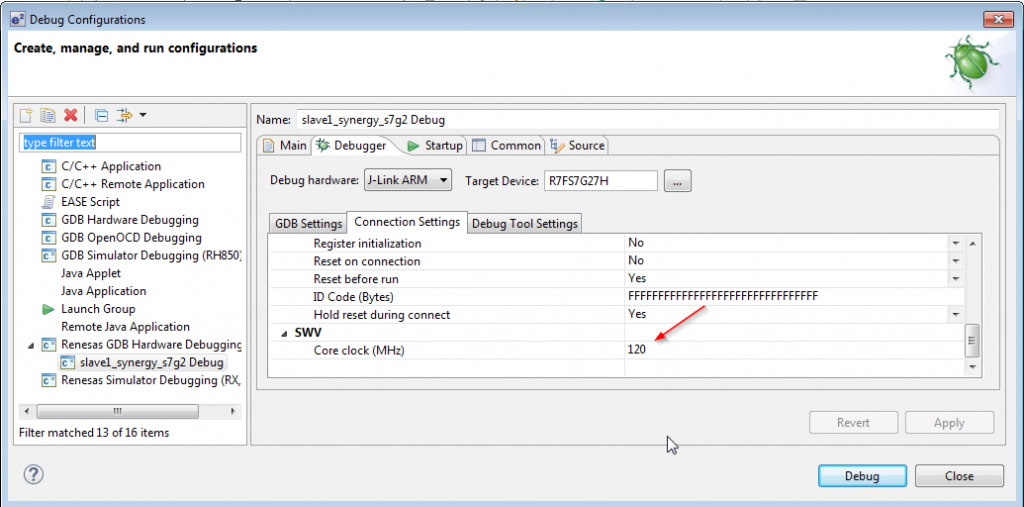
At the first you have to configure the SWO clock, that
is used for the Serieal Wire View (SWV). The maximum is cpu clock/2. Reduce it in case of trace problems.
You need to configure the Trace port 0.![]()
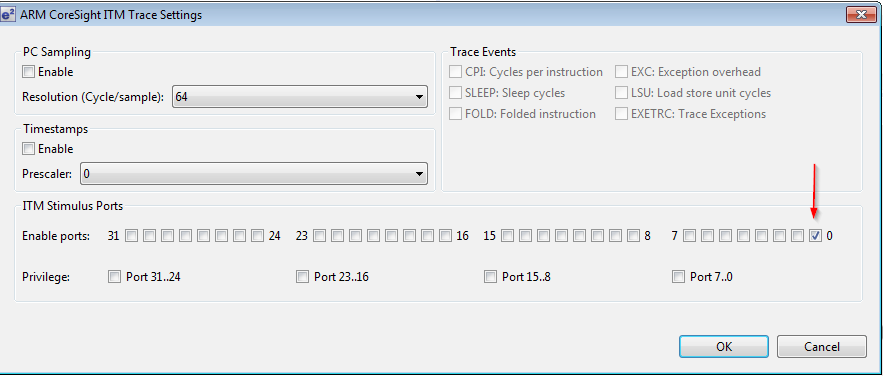
Now you can activate it and see the output in the console.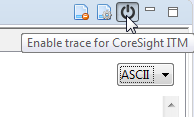
If you configured a wrong CPU clock in the Debugger you loose characters.
Also with this setting you activate the general trace mechanism. This create capture data, too. The printf() using the ITM port works almost without interaction to the application.
Note: The Debugger seems not activate the ITM port automatically, if active. In this case you need to Deactivate/Activate it on the Live Trace console.
We often include these debug prints into our CANopen example projects to signal some events, such as SDO read access, received Emergency messages or new NMT states or other information.